Anna Grossnickle Hines                                                                                    Home    Guide
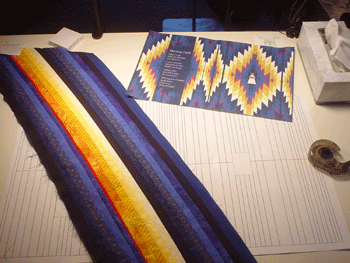
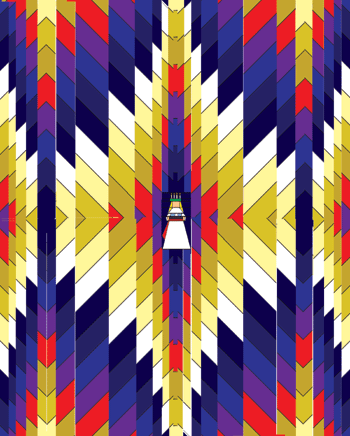
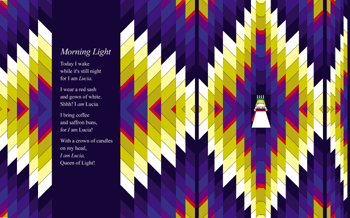
Creating the
Lucia Quilt

I wanted to surround Lucia, a young girl in white gown and red sash, wearing a crown of candles and bringing saffron buns and coffee to her family with a halo of glowing light. The technique I chose to use for this is called bargello. For reference I used two books by Marge Edie. Bargello Quilts and A New Slant on Bargello Quilts, both published by That Patchwork Place. I was inspired by the movement and glow Marge achieves in her work.

I started my design by drawing stripes and filling them with color. I had warmer tones in mind for the yellows, but wasn't very good at getting just the colors I wanted in PhotoShop. These would do for designing purposes. I copied the section of stripes and pasted it several times to get a repeated pattern. Then I rotated it 45 degrees to get the slant I wanted.

All images and text © Anna Grossnickle Hines 2005

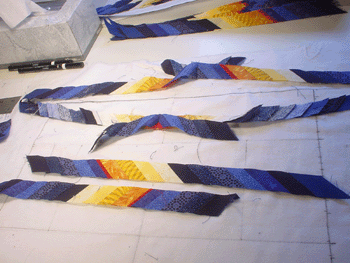
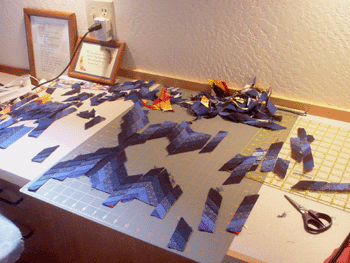
From here I "cut" vertical sections in varying widths and moved them up and down. Some I flipped or rotated to create the mirror image pattern.

I wasn't happy with my first design. It had too much red and looked too busy.

I made a new set of stripes reducing the width of the purple and red.

And tried another design. Better but still not quite what I want.

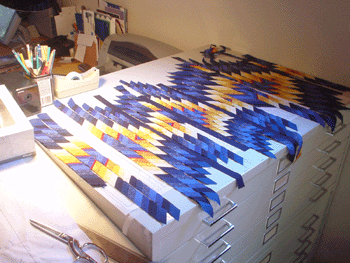
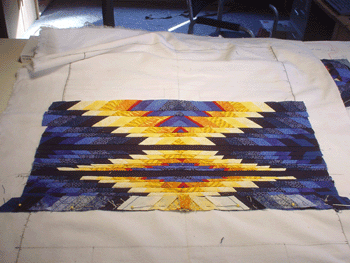
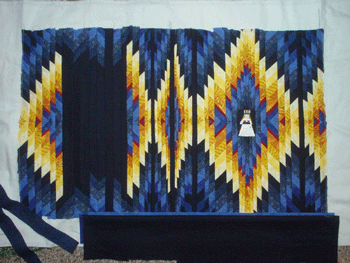
This one is more like it. More interesting and focused. I like the movement it creates.

I made the paper piecing pattern for the small Lucia. The actual size is 1 5/8 by 2 1/2 inches. Very tiny!

I had planned to work her in with the strips, but ended up appliquéing her on instead, since, tiny as she is, she still spread over four strips.

I drew a full size template to guide me as I put the stripes together.

I selected my fabrics and began cutting strips.
Then I sewed them together.
Now I have my pattern, my template and my stripes.
Following my design and the measurements on my template I cut my slanted strips, some with an up slant, some down.

I constructed this quilt and several others as Marge Edie directs in her books. Flannel is used at the batting and is layered on top of the backing fabric. I have traced some of the lines from my template onto the flannel to guide me as I sew. Later I will wish I had traced many more.

To make my horizontal mirror image I matched an up slant strip to a down slant strip and sewed at the appropriate place.
After making that horizontal seam, some of the strips are short. Part of the solution was to take the ends cut from trimming the seam and sew the appropriate pieces to the top and bottom of the strip.

When that wasn't quite enough, I used pieces cut from strips that were too long to fill in where strips were too short. I also needed extra blue ends to fill in above and below the dark blue text space. It's a lot like finding the right pieces for a puzzle.
With all the strips prepared I was ready to sew the quilt. Starting in the center I put the first strip face up, then matching my center line, I pinned the next strip face down. After sewing along the seam line. I pressed that strip out, pinned the next strip, stitched and so on.

It worked best to begin at the center and sew up, then back to the center and sew down. I used the lines drawn on the flannel to keep my work straight. (The next time I used this method I drew many more of these guide lines!) Sewing through the flannel batting and the backing makes this quilt as you go.

I ripped out several seams that puckered and even more that I didn't sew straight enough the first time. Once I put a strip on upside down and didn't notice until several strips later. Nothing to do about it except "rip, rip, rip"!

My quilt is finished. All that's left is deciding how to bind it. Of course, I chose a fabric that I was a little short on. Fortunately, I remembered purchasing it at Pincushion Boutique in Davis, California, and they were able to send me some more.

According to my diary not counting the border and design time, I spent about 64 hours sewing this quilt. One of the faster ones in this collection.


With this done except the border I started Nian.

Winter Lights Page
About the Winter Lights Holidays
Quilting Glossary and a Bit of History
Quilts, Dolls, and Books
Quilts in the Classroom
Quilter's Page
Book Page
Top of Page
Home
Guide